Saturday, April 7, 2012

Thrift Store Finds/Before & After

These aren't going to be huge, extravagant before & afters by any means, but I like them. :)

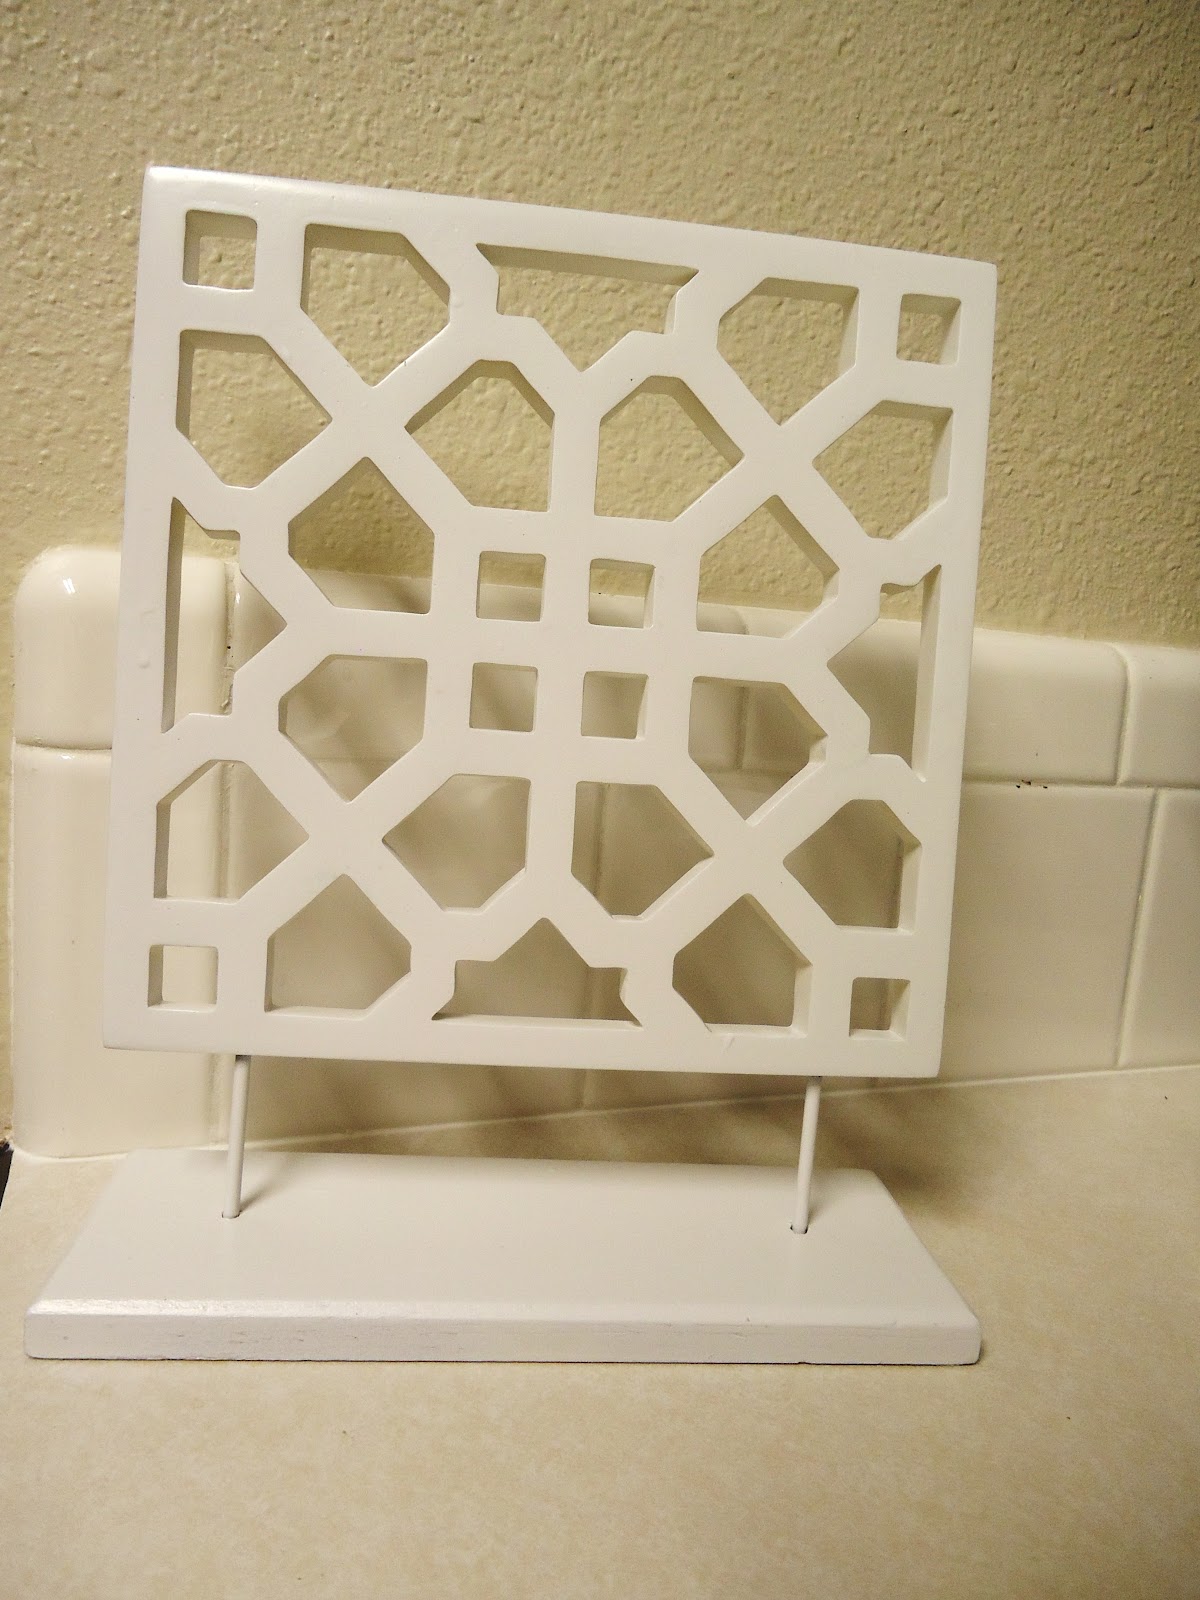
This "thing" ... I have no idea what it really is. I just saw it and loved the design on it. It was $1.25.
We just covered it in white spray paint, easy peasy, and it looks way better. The before picture doesn't really show how dirty and dingy it looked. Anyway, it looks great now!

Before                                                           After


These wall hanging candle holders were $5.00 each at Savers. (My goodness, I love that place.) I love the design on them so much! Josh actually found these, and just knew I'd like them. He's just good like that. :)

I love this design!


Anyway, we painted two of these black, and one of them white. The white one still doesn't have a home yet. But I had a plan for these ones. :)


 So here's our really sad beige-and-white-and-tan living room.

Before:


After!

You can see the candle holders hanging on either side of our finally-framed wedding photo. We also got a floating wall shelf at Savers for $5, and got the longer one at Home Depot to go with it.

You can see the "thing" tucked away behind a picture on the smaller shelf. I like it so much. I don't know why. :)

And I just got filler for that awesome green vase today. No picture of that yet. :)

So much more inviting now, don't you think?

Goodness knows, I'm not done yet. I definitely want to paint and do a few more things in this room. The thing is, all that costs money! So, until we have some of that, this works! :)

Friday, April 6, 2012

Target Gift Card Giveaway!

My awesome friend Ashleigh who I love so much just started an awesome blog. You will love it!

And today she is having a giveaway for a $25 Target Gift Card! (See that post here.)

Her very first post was a DIY on painting your counter tops. It sounded insane to me, but they pulled it off and made their counter tops look like granite! For $150! I am so excited to see what else she has in store for us!


(This the "after" for her counters. They totally look like Granite, right?!)

I want to do it to our counters, too! 


Thursday, April 5, 2012

Sweet and Sour Chicken (or Pork. yuck.)

I first posted this on my old blog, but am going to start trying to merge a few of my favorite posts to this one. This is one of my favorite recipes. It's yummy. You should try it. I first made it while I was in Papua New Guinea


Here's what you will need:
2/3 cups Soy Sauce
2 tsp. minced garlic (I basically always double garlic. Always.)
1 Tbs. minced ginger. (I keep mine in the freezer and grate it as I need it.)
1/4 cups flour
1/4 cups cornstarch
Salt and Pepper
1 Lb. of Chicken. Or pork, if you're into that. (As you can see, I'm not.) Anyways. Pick a meat, and cube it.
Oil
1 cup of ketchup
1/4 cup sugar
1/4 cup red wine vinegar
1 oz. honey or 1Tbs. sugar (I just do a squeeze or two of honey. It works.)
1 Tbs. vegetable oil 
1/2 Tbs. sesame oil
1/3 cups of each: onion, green pepper, red pepper, celery
1 cup pineapple. (And may I just say, in PNG, we picked and ate it the same day. DE.LI.SHUS. :)


Mix soy sauce, garlic, ginger, flour and cornstarch.


Season meat with salt and pepper. Place in bowl, and toss that disgusting looking sauce all over it. 


It kinda looks gross. But trust me. It's nom nom.


"Dredge" the meat in flour seasoned with salt and pepper. I like that word, "dredge." 


And now for the extra healthy part.

In a large frying pan, heat 1" oil to 350*. (To me, this translates to "heat up some oil in a pan at like... medium-ish temperature.")


While that stuff is cooking, in a separate bowl combine the ketchup, sugar, vinegar, and honey. Whisk them together and set it aside. Also, by the way, don't use a cereal bowl like I did. It's not whisk friendly like you might think.


Mmm.
Fry the meat until golden brown and drain on a paper towel covered plate.


Get your veggies all ready...
Onions.


Celery.


Red pepper.


Green pepper. 
(do you like the way I have carefully cut them all to size? haha. I am the worst cutter ever.)


And the best part, pineapple. This makes this dish, in my opinion.


Doesn't this look great?


Go on. Enlarrrrrge this.


Place the fried chicken and veggies in a roasting pan with the canola and sesame oil. 
Cover with the ketchup mixture. Bring to a simmer and cook til meat is tender.


Yummmmmmmm


Let me know if you try it! It's sooo yummy!

Tuesday, April 3, 2012

Etsy!

I have an Etsy. You know that.

I just wanted to share with you what I've been up to!

The other day I have the opportunity to have a mixed-vendor open house with some ladies from church. I was so nervous everyone would hate my designs, but it turns out, they don't. :) It went so much better than I thought it would, and I hope to do it again soon!

Here's my table all set up. The tablecloth, frames, bowls, jars and vases are all things I had on hand at home. I wanted to make a cute table with it all! What do you think?

Some of the pretties, available here.

Custom flower-girl bracelet order, available to order soon!

I also got in a bow-making mood, and have these available, too!


I made this baby bow, too. I love it. I want baby girls so I can make them obnoxiously huge bows to wear on their heads. :) You think I'm kidding... Don't you?

That's all for now! I have a few before/after posts coming soon! I guess I better go get some "aftering" done, for that to happen. 


Wednesday, March 28, 2012

DIY: Milk Glass- but not.

I love milk glass things. Who doesn't?
But to be honest, I am just way to cheap to buy it.

So. Enter the thrift store, where I picked up these vases because I loved their shapes.
Add some white spray paint- just cause it smells good.
I'M KIDDING, PEOPLE.
But seriously. I didn't even need to prime them. I just washed and sprayed a few coats on them.

After!

This one is my favorite.

I was squished up there. Moving them from here to there. From there to here. All over the place.

I love the start of my kitchen decor. I love simplicity. I think I will add a couple of platters and pitchers (maybe paint those a bold color, even?) and call it good for those plant shelves! Who invented plant shelves anyway? I hate them. 

But, I love this.

And this.

All that for a few bucks? I'm good with that. 


I'm linking up at Thrifty Decor Chick and the following:


Unveil Your Genius Link Party

Saturday, March 24, 2012

DIY: Laundry Detergent

I am so thankful I discovered this recipe (via Pinterest, of course, and you can see it here.)

It's genuinely an awesome feeling walking by the laundry detergent in the store knowing that I will never in my life buy it again. This will save us so much money, and the best part is, it's so easy to make!

You can get all of the supplies in the laundry section at Walmart. I think I spent $12 on them all, and they will make alot of batches of laundry soap! I also purchased a cheese grater for $1 at the thrift store because I didn't want our cheese tasting like soap. Just in case. Otherwise, I used everything else I use for cooking!

Here's what you need:

1/4 bar of Fels Naptha Soap
2 Tablespoons of Borax powder
1/4 Cup Arm and Hammer Washing soda (NOT baking soda.)

First, Grate 1/4 bar of Fels Naptha into small shreds.
 (Store the other sections you aren't using today in a Ziploc bag for later use.)


Throw the grated Fels Naptha and 1 cup of water in a pot and melt over medium-low heat, stirring constantly.  Continue until you have melted all the shreds of soap.


Fels Naptha soup!

Put the contents of your pot into a bucket, large container, whatever. It will need to be able to hold quite a bit of liquid though, whatever you choose!

Add 10 cups of water, the Washing Soda and Borax. Stir it up! After that, add 10 more cups of water and stir it again.

If the container you are using has a lid, then you are cool. If not, transfer to containers with lids. 
Let that sit overnight.

....The next day... 

You have bowls of goop. It looks SO gross, and smells SO clean. 


So. Stir it up as much as you can, then you are ready to transfer it to whatever containers you are using. Last time I made this I put it in old milk jugs and it worked awesome. This time I wanted the containers to match, because I'm OCD like that, and I am actually really unhappy with the containers I bought. They will leak if I'm not careful! So next time I'm back to milk jugs, or something of the like.

Anyway. Fill your containers HALF WAY with your laundry goop...


...then finish it off with water. 
Shake it up, then you are ready to do laundry!  

Use 1/4-1/2 cup per load. 

It doesn't get sudsy, so that was something I had to get over. I guess I'm just wired to think that if there are bubbles, it's getting clean. Well, not true. This stuff works great and doesn't suds up! (Which, for you fancy HE washer people, this is good news! I'm told you can use this soap in those machines with no problems!)

I found the recipe here, like I said. This lady is cool and did the math for us, finding out that
 it only costs 20¼¢ for the ingredients to make a 75-load bottle of detergent. OH MY GOODNESS. I know. This is great, right?


I would love to hear if you tried this! If you have any questions just leave a comment or email me!

I'm linkin' up!

Monday, March 12, 2012

Hey girl...

Have you seen those pictures of Ryan Gosling on Pinterest where he says things like "Hey girl, I love the way you made that mason jar into a soap dispenser." ?  Anyway. They make me laugh so hard- for whatever reason.

I made this one for Josh. It makes me laugh. It may or may not be true.

Poor guy puts up with so much!